Glutenfri Havrebrød Opskrift

This is the Danish translation of the recipe. The English version is here.

Forberedelse: 10 + 5 min. Hævetid: 30 min. Bagetid: 45-50 min. Portioner: 18.

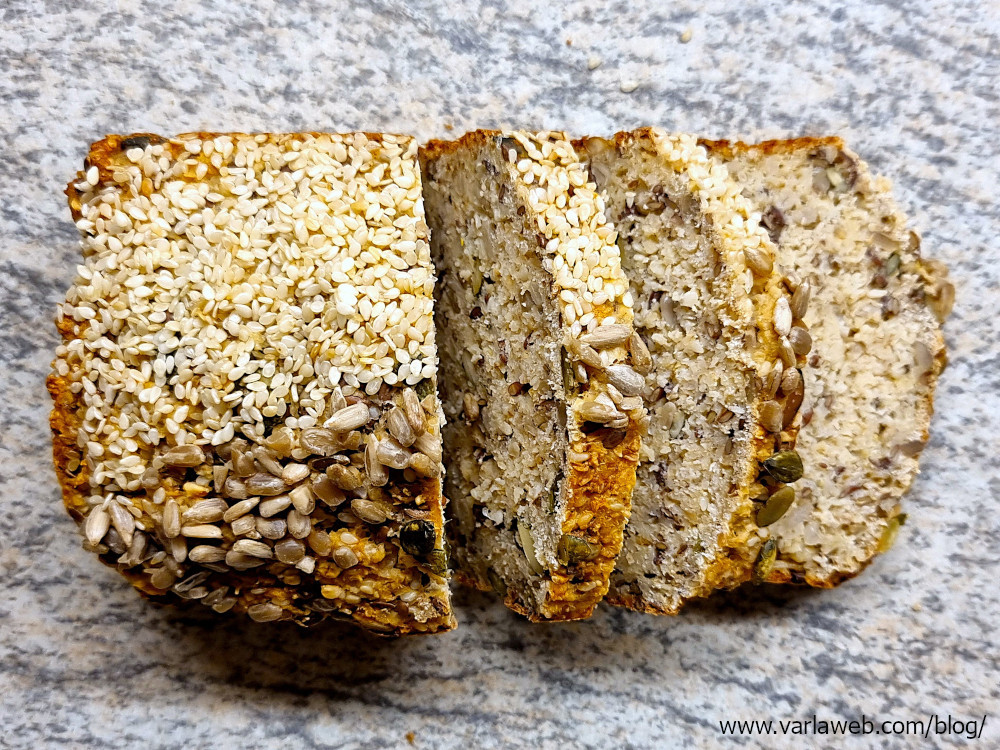
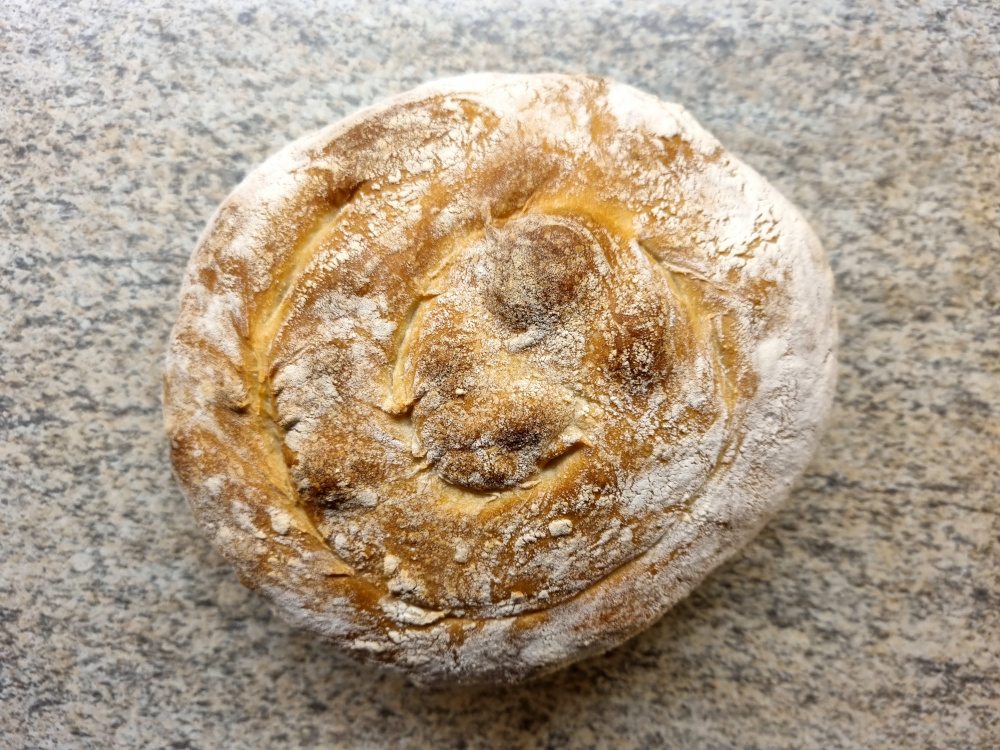
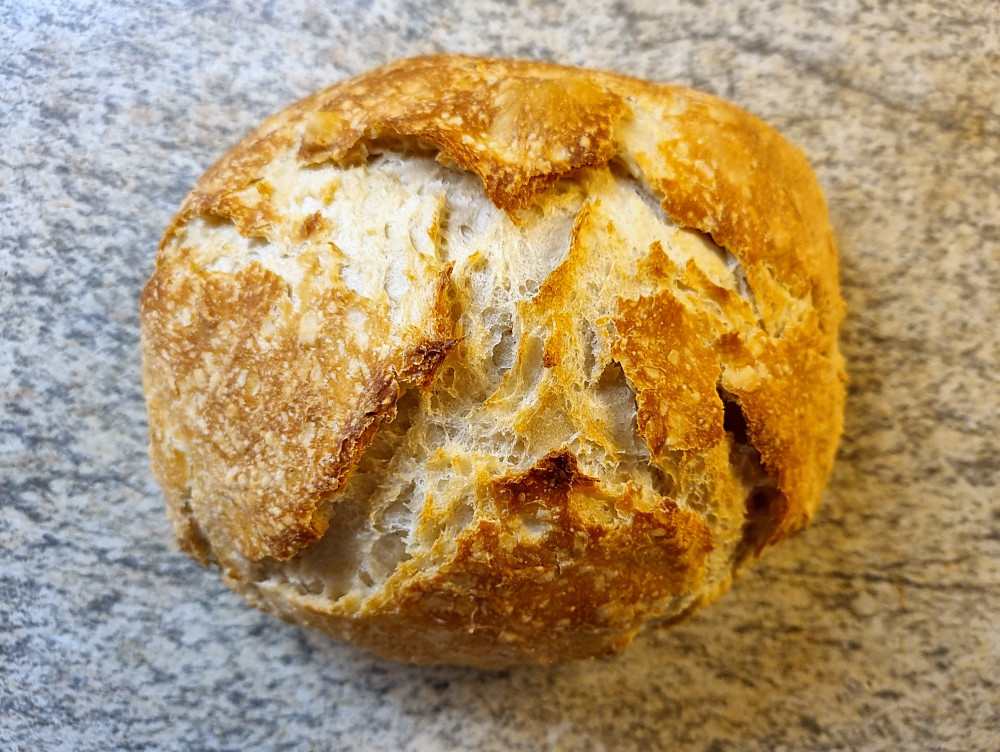
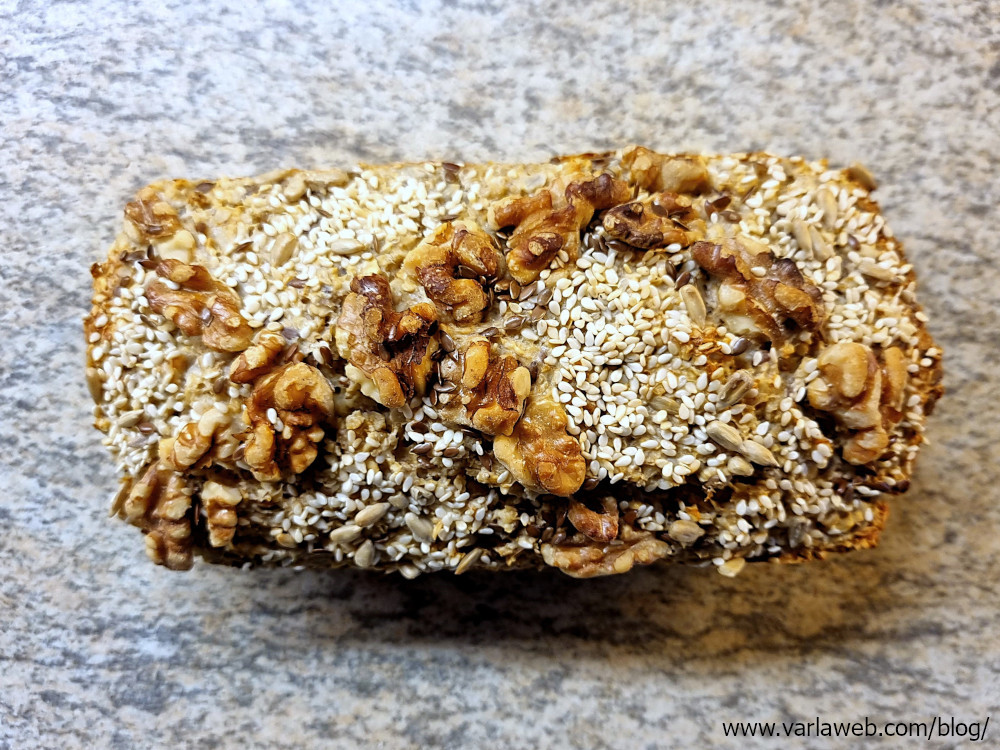
Konsistensen af dette brød minder om hjemmebagt rugbrød, men det smager som fiberbrød. Det har en tynd, hård skorpe, kan skæres forholdsvis tyndt og mætter godt. Det kan laves fuldstændigt glutenfri og er fuld af fiber, D-vitamin, jern, og protein. En skive indeholder omtrent 70 kalorier. Hvis det opbevares forsvarligt, kan det holde i mindst fire dage. Det smager godt med Brie eller andre slags stærke eller pikante pålæg, såsom rejesalat eller paté, eller sammen med en salat.

Jeg har inkluderet både en kort version af opskriften, og en detaljeret, med billeder.

Redskaber

Du får brug for to skåle, en stor, blød spatel eller flad ske, et piskeris, og en bageform, med lav kant, som er 10 cm bred og mindst 18 cm lang. Du får også brug for et stykke kvalitets bagepapir, en blender, og måleredskaber.

Ingredienser

  • 1 Æg
  • 1 Æggehvide
  • 25 ml Citronsaft (omtrent en halv citron)
  • 1 dl Lavfedt yoghurt (kan være plantebaseret)
  • 1 dl Lavfedt græsk yoghurt (græsk “inspireret” er ok, men den skal være tyk)
  • 75 gr Havregryn
  • 75 gr Havregryn, fint hakkede
  • 1 tbsp Hørfrø, fint malede
  • 1 tsp Bagepulver
  • ½ tsp Natron
  • ½–1 tsp Salt
  • Frøblanding eller valnøddeblanding (se forneden)
  • Valgfrit Extra havregryn, frø eller nødder til at pynte overfladen

Valnøddeblanding

  • 30 gr Valnødder, let hakkede
  • 20 gr Solsikkekerner
  • 20 gr Sesamfrø
  • 2 tbsp Hørfrø

Frøblanding

  • 30 gr Hørfrø
  • 20 gr Solsikkekerner
  • 20 gr Sesamfrø
  • 2-4 tbsp Græskarkerner

Hørfrø er ret salte. Jeg anbefaler kun en halv teske salt sammen med denne blanding.

Ingredienser, bemærkninger

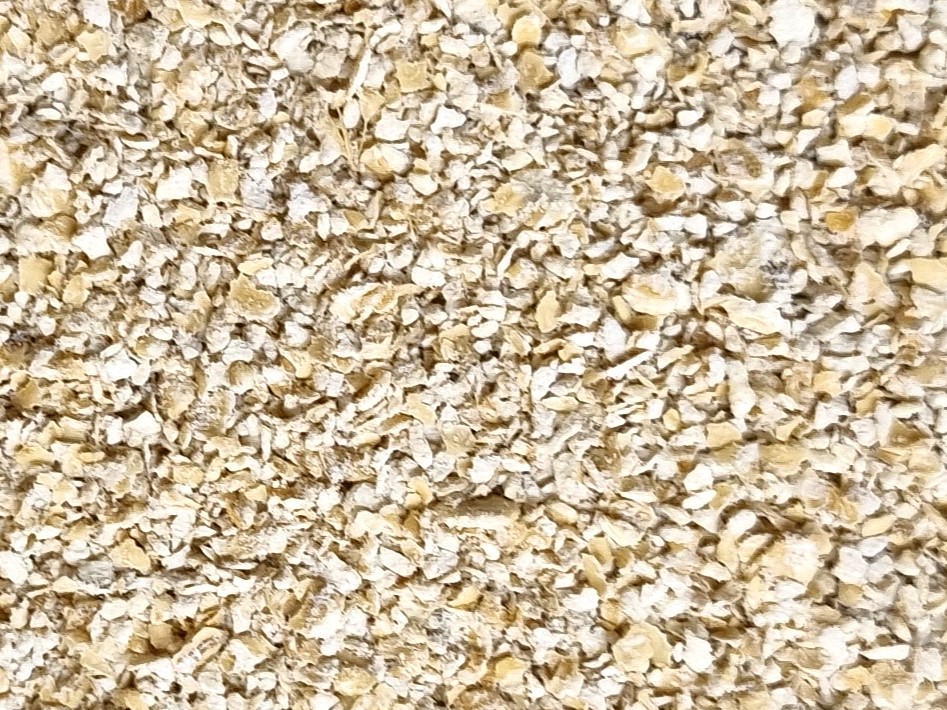
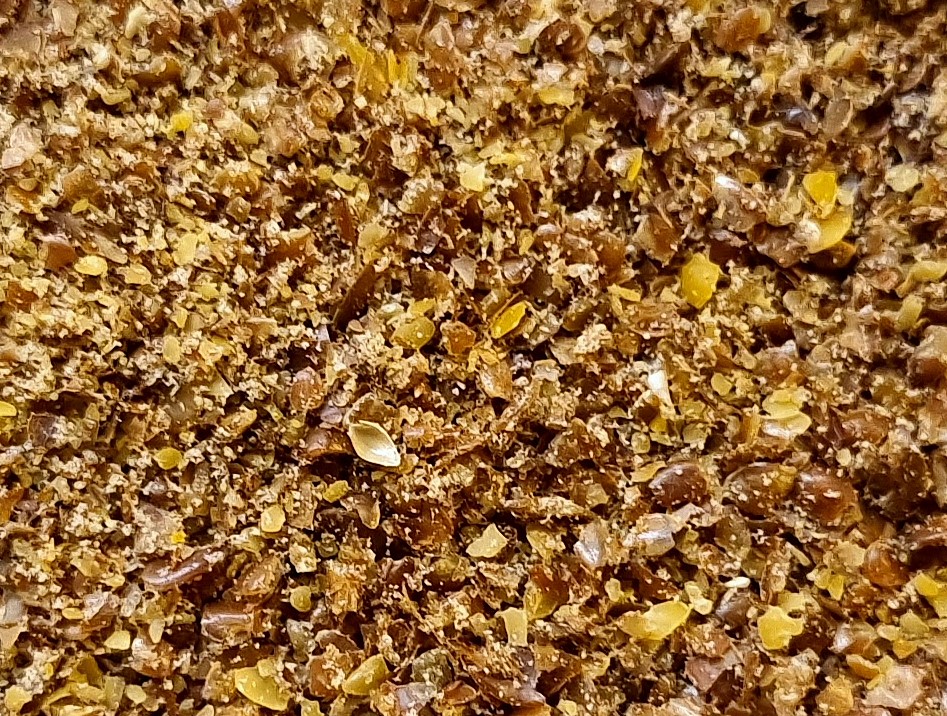
Hørfrø og havregryn kan hakkes i en blender. En lille maskine er nok. Har du en power-blender, så brug pulse funktionen på havregrynene, da de ellers hurtigt kan blive til mel, og det er ikke, hvad vi går efter.

Konsistensen af de hakkede havregryn og de malede hørfrø skal se nogenlunde sådan her ud:

Opskrift, kort

  1. Kom alle de tørre ingredienser i en skål. Bland godt.
  2. I en anden skål, tilsæt alle de våde ingredienser, en ad gangen, og pisk efter du har tilsat hver ingrediens.
  3. Gradvist tilsæt den tørre blanding til den våde blanding, og vend dem nænsomt sammen til en dej.
  4. Lad hvile i en halv time under et klæde et halvkøligt sted. Varm ovnen ved 180 C (luft), 200 C, eller 6 (gas).
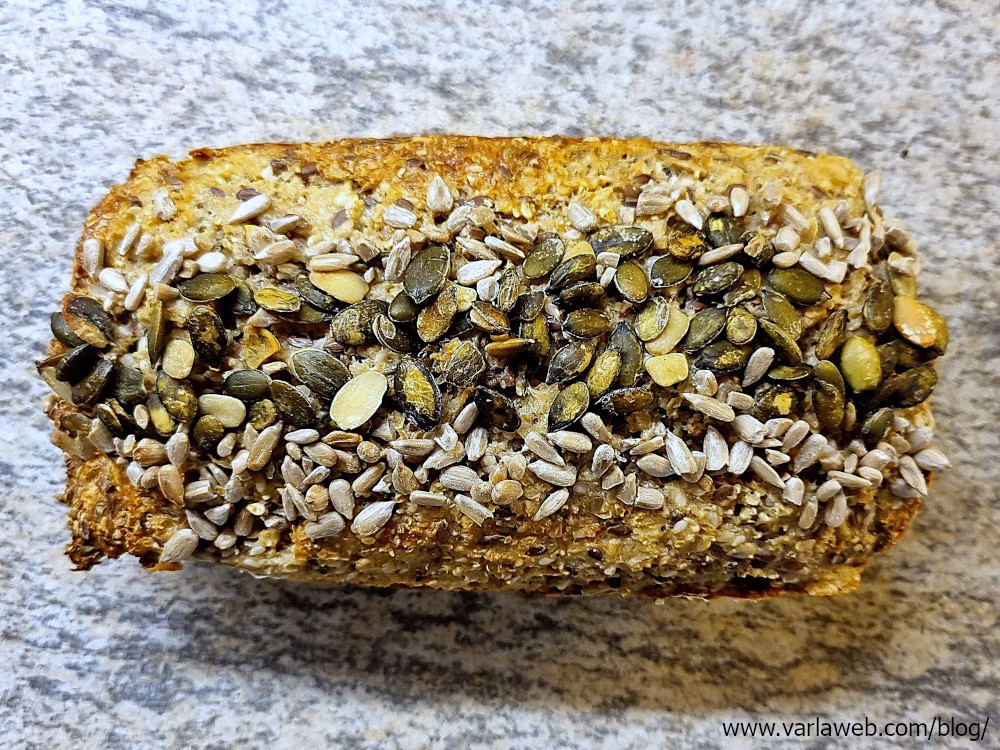
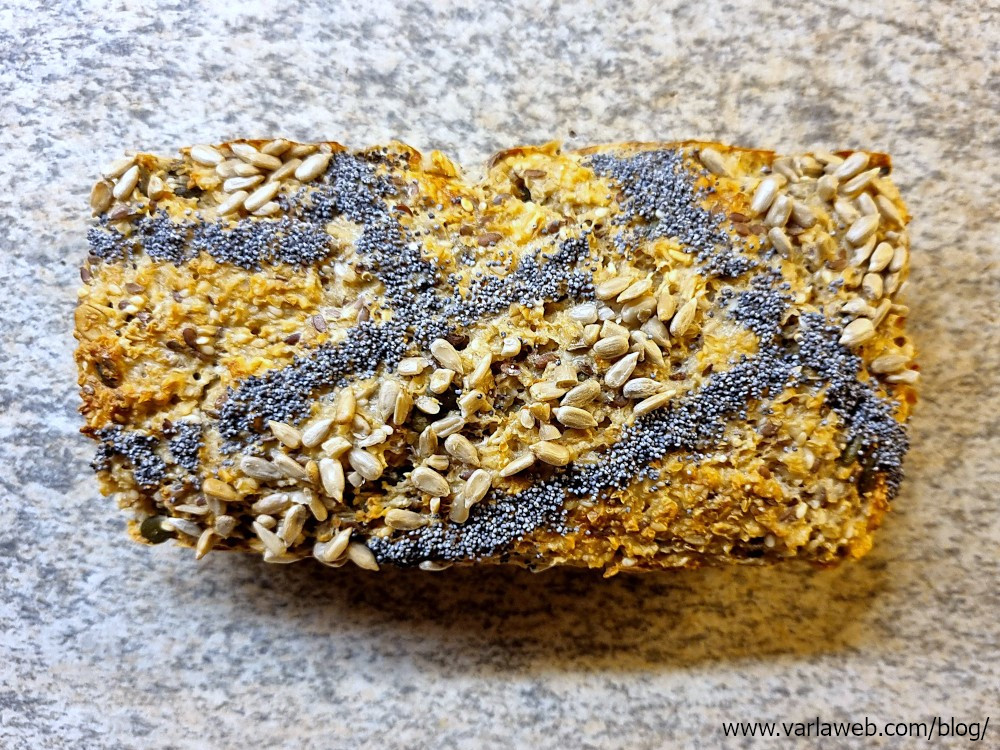
  5. Anret bagepapiret i din bageform. Fordel dejen forsigtigt uden at trykke for meget. Hvis din bageform er længere end 20 cm, form brødet så det har den rette længde. Stænk overfladen med lidt vand og glat den ud med en spatel. Pynt med gryn, frø eller nødder.
  6. Du har to muligheder, når du bager brødet:
    1. For et fast brød, der nemt kan skæres i skiver, bag i 45-50 min. Placer en skål med vand i ovnen i de første 20-30 min, eller indtil brødet er blevet fast, fjern derpå skålen.
    2. Spring skålen over og bag i 45-55 min, for en mindre fast version af brødet.
  7. Tag brødet ud af formen med det samme efter bagning. Hvis skorpen bliver revet af, når du piller bagepapir væk, skal brødet have 5 min mere i ovnen.
  8. Lad brødet køle af på en rist. Når det er helt afkølet, opbevar det under et klæde eller i en brødkasse.

Opskrift, udførlig

  1. Kom frø eller valnøddeblanding, malede hørfrø, bagepulver, natron, salt, og al havregryn i en skål. Bland godt, så bagepulver og natron er godt fordelt.
  2. I en anden skål, tilsæt æg, æggehvide, citronsaft, og yoghurt, en ad gangen, og pisk efter du har tilsat hver ingrediens.
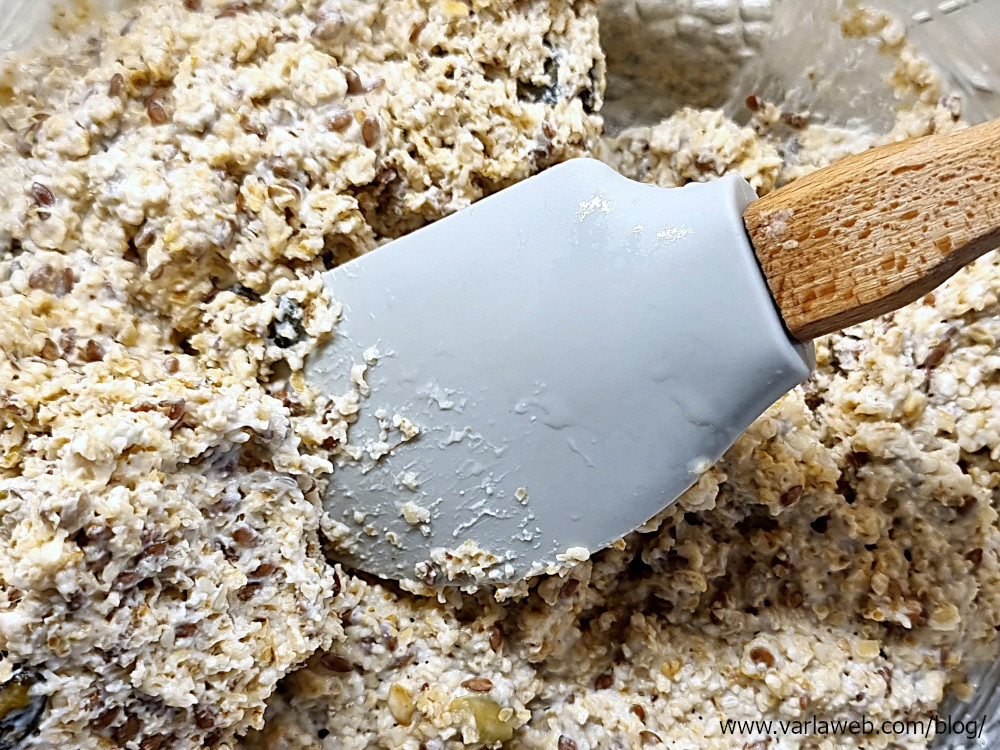
  3. Gradvist tilsæt den tørre blanding til den våde blanding, og vend dem nænsomt til en dej. Bare nok til at dejen er ensartet. Dejen bør ligne og føles som meget tyk havregrød.

  1. Lad dejen hvile i en halv time under et klæde et halvkøligt sted. Varm ovnen ved 180 C (luft), 200 C, eller 6 (gas). Efter hævning bør dejen have fået mere volume og en mere luftig, fast konsistens, som kan formes.

Hvis din dej ikke hæver, så lad den stå lidt længere eller/og et koldere sted, dog helst ikke køleskabet. Luftfugtighed og -temperatur har betydning. Om sommeren skal jeg tit give min dej lidt mere hvile end ellers. Valnøddeversionen kan iøvrigt godt lide længere hævning.

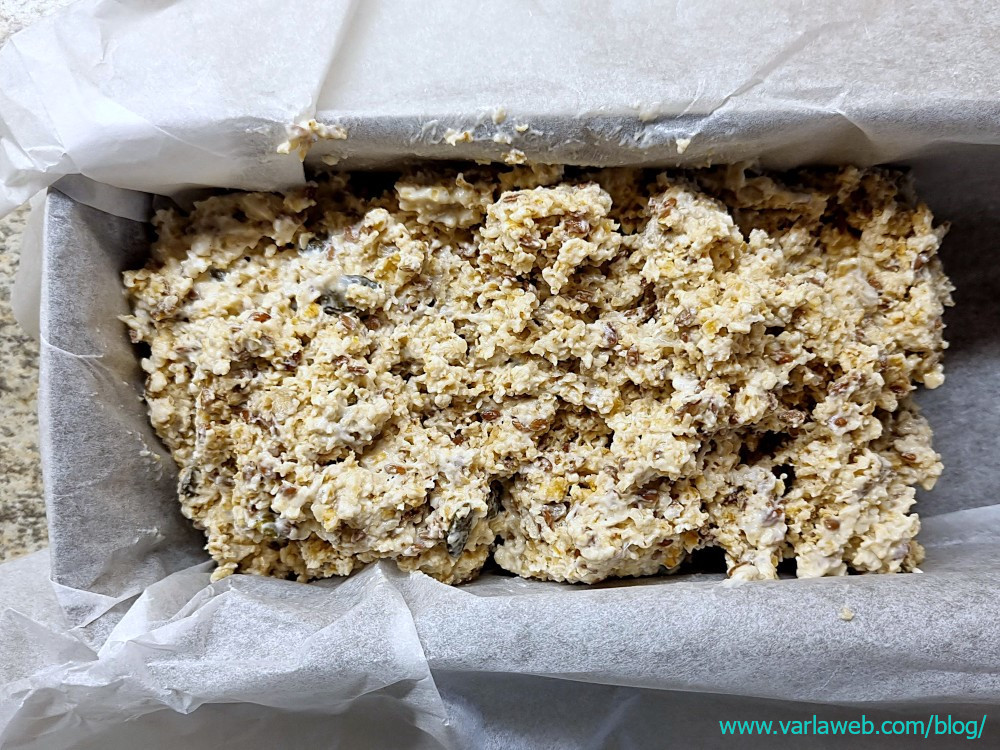
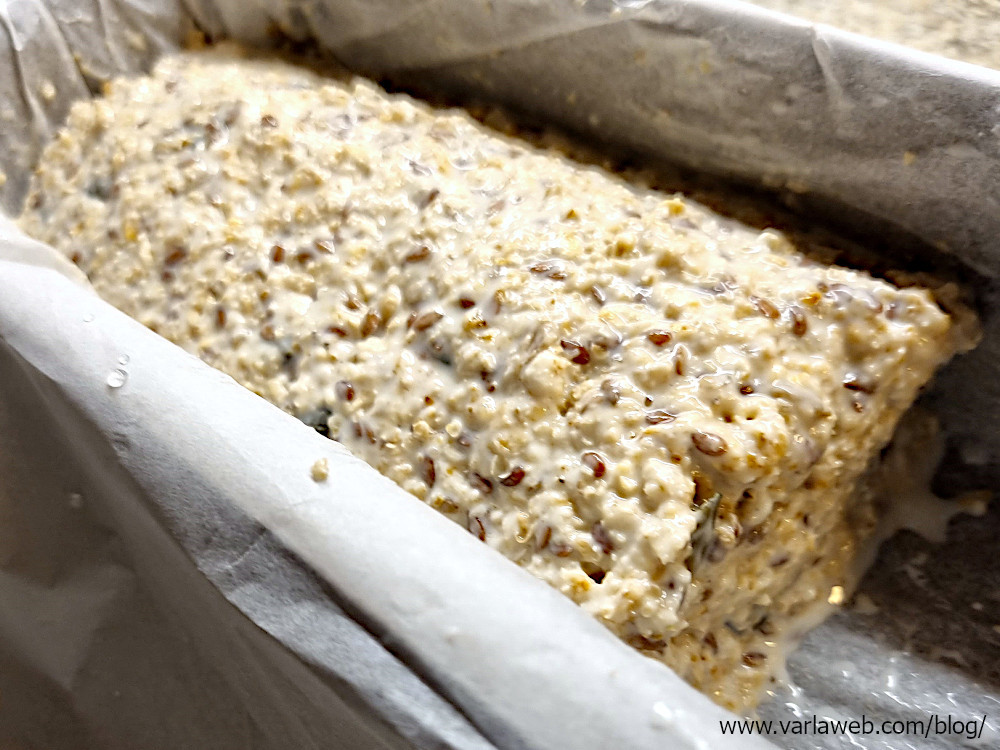
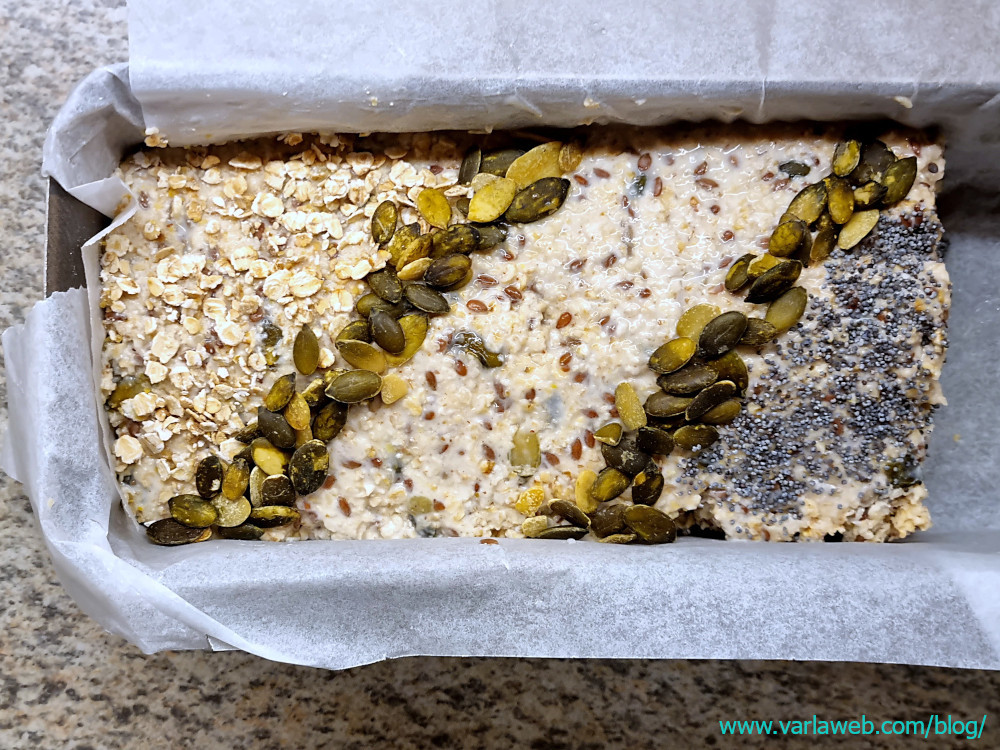
  1. Anret bagepapiret i din bageform. Fordel dejen forsigtigt uden at presse for meget. Prøv at få dejen ind i hjørnerne af formen, så bliver brødet pænest. Hvis din bageform er længere end 20 cm, form brødet så det har den rette længde; dejen løber ikke under bagningen. Stænk overfladen med lidt vand og glat den ud med en spatel. Du kan forme overfladen i en let bue, så den får en pæn form, og pynte med gryn, frø eller nødder.

Hvis din dej ser meget tør ud efter hvile, brug bare et par skefulde mere vand, når du former. Er brødet lavet med en plantebaseret yoghurt, vil dejen ofte være mere tør i det.

  1. Du har to muligheder, når du bager:
    1. For et fast brød, der nemt kan skæres i skiver, bag i 45-50 min. Placer en ovnfast skål med vand i ovnen i de første 20-30 min, eller indtil brødet er blevet fast, fjern derpå skålen. Valnøddeversionen vil gerne have mere damp end frøversionen.
    2. Spring skålen over og bag i 45-55 min, for en mindre fast version.
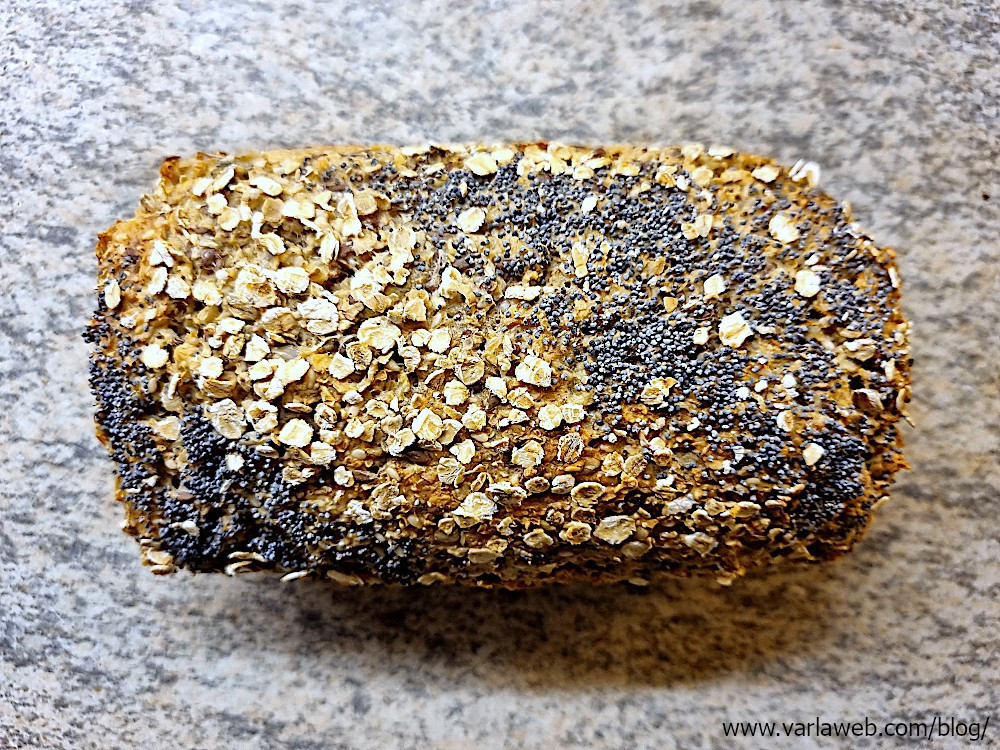
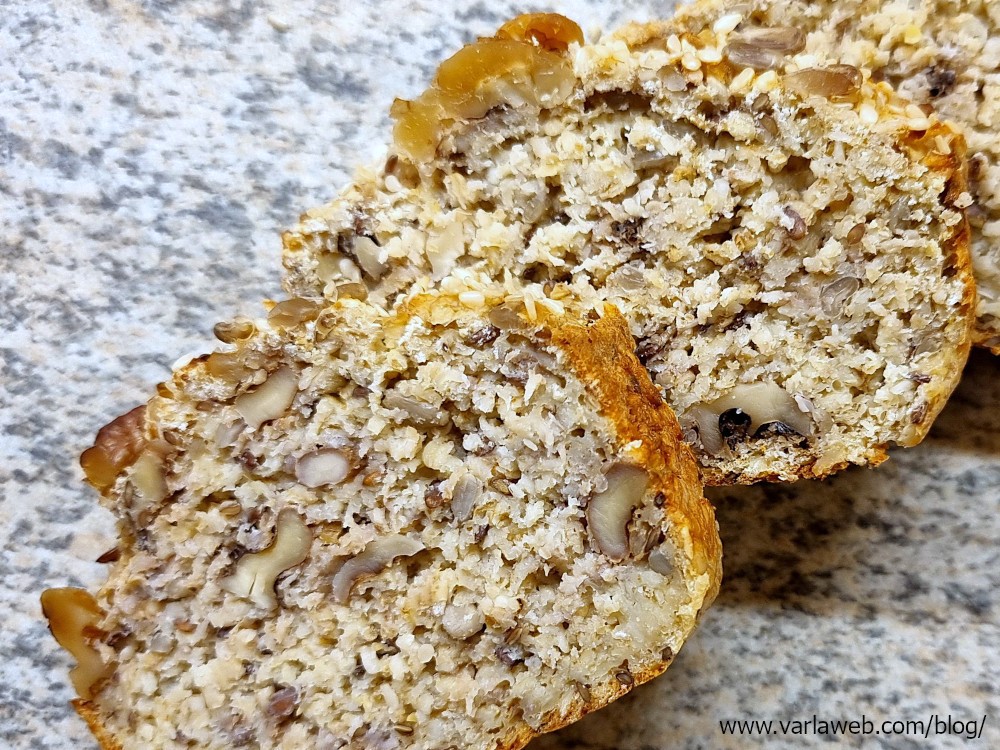
  2. Tag brødet ud af formen med det samme efter bagning. Brødet skal være fast, men skal give lidt efter når du trykker på overfladen. Skorpen skal være tynd, hård, med en rødlig glød. Hvis skorpen bliver revet af, når du piller bagepapir væk, skal brødet have 5 min mere i ovnen. Ellers lad brødet køle af på en rist.
  3. Når det er helt afkølet, opbevar brødet under et klæde eller i en brødkasse, gerne et halvkøligt sted. Du kan gemme det i en lufttæt beholder, men så bliver skorpen ofte blød. Det kan også kommes i køleskabet, men så risikerer man, at det kommer til at smage surt.

Hvis dit brød virker underbagt, husk dette er et saftigt brød. Hvis du skærer i det, mens det stadig er varmt, ja, så er det noget klæbrigt stads. Lad brødet køle. Succes måles ved, når det er afkølet, kan du nemt skære det i skiver, og bryder brødet som brød skal?

Få idéer til hvordan du kan pynte dit brød her.

God fornøjelse 🙂

Cold-Proofed Artisan’s Bread

This is a good recipe. By Fast Easy Delicious.

A cold-proofed leave-overnight-in-the-fridge Italian rustic style bread. It’s not quite as fluffy as the classic artisan’s Italian rustic bread, but falls somewhere between that and a Ciabatta in taste and texture.

Do use best bread flour. Do knead well. I use a simple braided bread basket for the proofing and leave the dough for longer than a hour in a warm location for it’s second proofing, so that the chill has quite dissipated.

Gluten-Free Oat Bread Loaf Recipe

Foretrækker du opskriften på Dansk? Den har du her.

Preparation: 10 + 5 min. Proofing: 30 min. Baking: 45-50 min. Portions: 18.

This bread is savoury, moist, with substantial texture and a thin crust, and can be sliced thinly. It can be made entirely gluten-free and is rich in fibre, D vitamin, iron, and protein. A slice contains roughly 70 calories. If stored properly, it will keep for at least four days. It goes well with Brie or savoury spreads, such as paté, or on the side with a salad.

I have included both a quick set of instructions, and a detailed set of instructions, with pictures.

Utensils

You will need two bowls, a large, flexible spatula or flat spoon, a whisk, and a bread tin that is 10 cm wide and at least 18 cm long. You will also need a sheet of quality greased baking paper, a blender, and measuring equipment.

Ingredients

  • 1 Egg
  • 1 Egg white
  • 25 ml Lemon juice (roughly half a lemon)
  • 1 dl Plain low-fat yoghurt (this can be plant-based)
  • 1 dl Low-fat Greek yoghurt (Greek “inspired” will do, but it needs to be thick)
  • 75 gr Rolled oats
  • 75 gr Rolled oats, finely chopped
  • 1 tbsp Flaxseeds, finely ground
  • 1 tsp Baking powder
  • ½ tsp Baking soda
  • ½–1 tsp Salt
  • Seed mix or walnut mix (see lower down)
  • Optional Additional oats, seeds or nuts for garnishing

Walnut mix

  • 30 gr Walnuts, lightly chopped
  • 20 gr Sunflower seeds
  • 20 gr Sesame seeds
  • 2 tbsp Flaxseeds

Savoury Seed Mix

  • 30 gr Flaxseeds
  • 20 gr Sunflower seeds
  • 20 gr Sesame seeds
  • 2-4 tbsp Pumpkin Seeds

Flaxseeds are quite salty. I don’t recommend more than ½ tsp salt along with this mix.

Ingredients, notes

Flaxseeds and oats can be ground in blender. A small chopper will do. If you have a high-powered blender, use pulse function on the oats, as they will quickly turn to flour, and we don’t want that.

The texture of the chopped oats and ground flaxseeds should look something like this:

Instructions, quick

  1. Add all the dry ingredients to a bowl. Mix well.
  2. In a second bowl, add all the wet ingredients, one at a time, and whisk after adding each ingredient.
  3. Gradually add the dry mix to the wet mix, gently folding them together.
  4. Proof for half an hour under a cloth somewhere coolish. Preheat oven at 180 C (fan), 200 C or 6 (gas).
  5. Line the baking tin with baking paper. Gently distribute the dough with as little pressure as possible. If your tin is longer than 20 cm, shape the bread to the appropriate length. Sprinkle the surface with water, and smooth it out with a spatula. Garnish with seeds, oats or nuts.
  6. You have two baking options:
    1. For a firm, thinly sliceable bread, bake for 45-50 min. Place an bowl of water in the oven for the first 20-30 min, or until the bread has firmed up, then remove the bowl.
    2. For a more spongy version, skip the bowl and bake for 45-55 min.
  7. Lift the bread out of the tin immediately after baking. If the crust tears when you peel off the baking paper, it needs five more minutes in the oven.
  8. Once the loaf is quite cool, store in a bread bin or under a cloth.

Instructions, detailed

  1. Add seed or walnut mix, ground flaxseeds, baking powder, baking soda, salt, and all of the oats to a bowl. Mix well, so that the leavening agents are evenly distributed.
  2. In a second bowl, add egg, egg white, lemon juice, and yoghurt, one at a time, and whisk after adding each ingredient.
  3. Gradually add the dry mix to the wet mix, gently folding them together. Don’t over-mix. Your mixture should look and feel like thick porridge.

  1. Leave the mixture to proof for half an hour under a cloth somewhere coolish. Preheat your oven to baking temperature 180 C (fan), 200 C, or 6 (gas) while you wait. After proofing, your mixture should’ve increased in volume and acquired a fluffy, denser texture that can be moulded and shaped.

If your dough isn’t rising, leave for longer time, and/or in a cooler environment, but preferably not in the fridge. External humidity and temperature are a factor. I live in a very humid region, and in the summer I often find that my oat loaf needs to proof 15 or even 30 minutes longer. Also, the walnut version of the bread enjoys a longer proofing as it is less dense.

  1. Line the baking tin with baking paper. Gently scoop the dough into the tin, distributing it with as little pressure as possible. Be sure to get into the corners for a neatly formed bread. If your tin is longer than 20 cm, simply shape the bread to the appropriate length; the dough won’t run during baking. Sprinkle the surface with water, and smooth it out with a spatula. You can accentuate the middle a little, to give it that loaf shape, and garnish with seeds, oats or nuts.

If your dough seems very dry after proofing, add one or two extra tablespoons of water to the surface. If you used a plant-based yoghurt, the dough will often be more dry.

  1. You have two baking options:
    1. For a firm, thinly sliceable bread, bake for 45-50 min. Place an ovenproof bowl with some water in the oven for the first 20-30 min, or until the bread has firmed up, then remove the bowl. The walnut version of the bread tends to need longer than the seed version to set.
    2. For a more spongy version, skip the bowl and simply bake for 45-55 min.
  2. Lift the bread out of the tin immediately after baking. The bread should be firm, with a springy feel to it, and have developed a thin, hard crust with a ruddy colouring. If the crust tears when you peel off the baking paper, it needs five more minutes in the oven. If not, let the bread breathe on a cooling rack.
  3. Once the loaf is quite cool, store in a bread bin or under a cloth. You can store in an air-tight container, but that will soften the crust. Place somewhere coolish for maximum shelf life. It can be stored in the fridge, but I don’t recommend it, as this brings out the acidic flavours.

If your bread feels under-baked, remember that this is a moist bread. If you cut into it while it is still warm, it will be gooey. Cooling will adjust this. The ultimate test is, once it has cooled, does it slice neatly, and if you break a slice in half, does it tear like bread should?

Check out www.varlaweb.com/blog/oat-loaf/ for ideas on how to garnish your bread.

Happy baking 🙂

Italian Rustic Artisan’s Bread

I have been trying out a number of recipes and techniques for Italian rustic artisan’s bread (also know as Italian peasant bread or, simply, rustic bread).

This is a good recipe. By Emma Fontanella.

In the video, she also demonstrates the stretch-and-fold technique which boosts the dough by increasing tension and elasticity. I have applied the technique to other recipes with great effect.

The stretch-and-fold technique is time-consuming, as you need to return to the dough several times during the long proofing period, but the result is amazing. You actually can see the bubbles forming in the dough as you progress. And for a rustic bread, that’s what you want. A big bread, with a crisp crust, and fluffy insides.

A rustic bread is usually baked in a lidded metal vessel, typically a Dutch oven. I don’t own a Dutch oven, but have made do with a large casserole dish. The dish is oval in shape, so I do have to take care when placing the dough in the baking vessel to keep that nice round shape.

Do use best bread flour (12% protein). Do heat your vessel first. Do take out the bread immediately when done, and let cool on a rack, and store properly. Or that lovely crust will go soft. However, if it does go soft, you can pop the bread in a pre-heated oven at 200 C (fan) for ten minutes, along with a dish of water. That can restore the crunch. And invest in proper oven mitts.

Take me to your leader?

These are some of my most advanced and oldest Christmas / New Year ornament designs. Known in the family as my little “galaxies” or, simply, the “spacepods”. To heavy and awkward to go on the tree, they brighten up the dining room, catching even the dimmest light.

DIY handmade Christmas galaxy-shaped ornaments. Sequins, wax, plastic and glass beads, styrofoam shape, and sewing pins.

I Sequin You!

For ten years or so I have held up the tradition of making my own Christmas ornaments. These are styrofoam shapes adorned with sequins, beads and ribbons, attached with sewing pins.

They take a long time to make, so I maintain them with great care.

I make them in many shapes and sizes. These are some of my hearts.

Some are identical on each side. Some are not.

The pins make the ornaments surprisingly heavy. These hearts above cannot go on the Christmas tree, but make for great table decorations.

They look especially glorious when grouped together.

These, however, are light enough to go on the tree.

Gluten-free Oat Bread Loaf with Seeds and Walnuts

I have been working on an oat loaf for a while. Here is the recipe.

I made many experiments and variations of this bread, playing back and forth with moisture and texture. Adding an egg white here, subtracting some yoghurt there, increasing and decreasing the oats, chopping, blending, or combining them.

I wanted to reliably bake a savoury bread that didn’t go mudbrick or soggy on me, and which can be sliced thinly. Gluten-free loaves have a tendency to come apart if you don’t slice them up in chunks.

The thing that finally made the loaf come together, was adding a tablespoon of ground flaxseeds, and adding a water basin to the baking process. I shall keep these tips in mind for future projects.